
How To Install Workshop Mods On Your DayZ Server
DayZ has an extensive modding community, and adding Workshop mods to your server is a straightforward process. This guide walks you through finding, installing, and enabling mods on your DayZ server.
Important: If you haven't set up mods on your client yet, take a look at our guide on how to install Workshop mods for your DayZ client first.
Finding Steam Workshop Mods
- Head over to the DayZ Steam Workshop to browse available mods: https://steamcommunity.com/app/221100/workshop/
- When you find a mod you want, grab its Workshop ID from the URL.
For example, given this URL:
https://steamcommunity.com/sharedfiles/filedetails/?id=1559212036
The Workshop ID would be 1559212036.
Adding Steam Workshop Mods to Your DayZ Server
Mods can be installed directly from the Config tab in your server control panel.
- Log into your control panel and Stop your server.
- Go to the Server Config tab.
- Enter the Workshop IDs for each mod you want to install in the ADDITIONAL MODS field, with a "@" in front and separating them with semicolons (;).
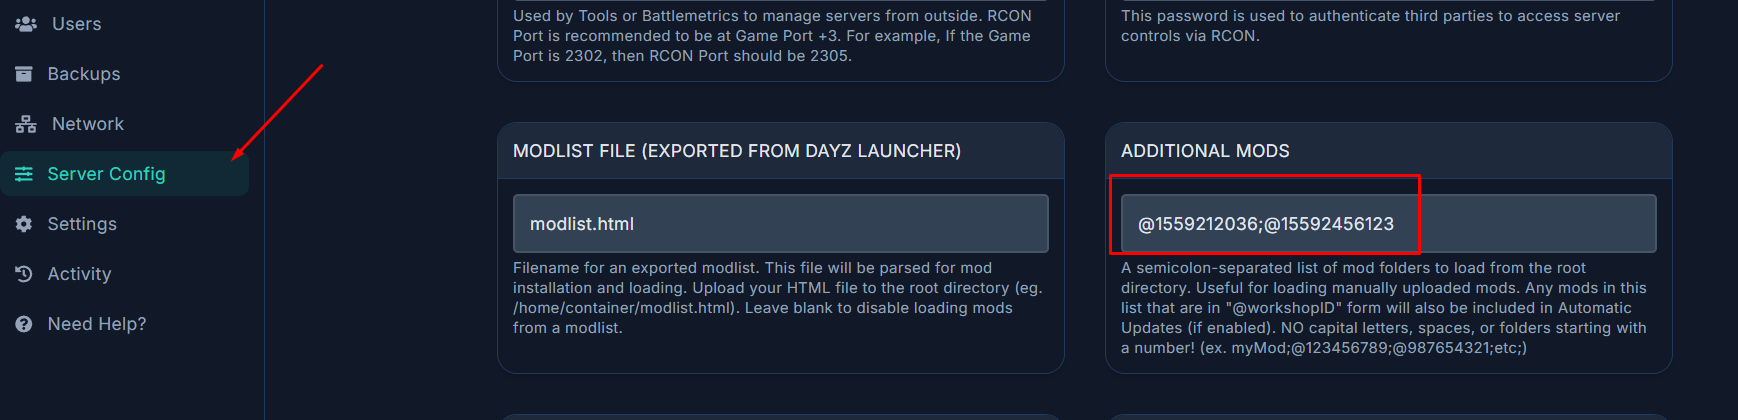
Note: Make sure there are no spaces between the mod IDs and semicolons, as this can cause problems.
- Click Save, then Start the server. Your mods will be downloaded automatically and you'll see new
@ModNamefolders appear under in File Manager tab.- Additional Mods: These must be installed on both the client and server (maps, items, gameplay changes).
- Server-side Only Mods: These only need to run on the server side (admin tools, logging utilities).
Use a semicolon (;) to separate multiple mod entries.
- Save your changes and Restart the server for everything to take effect.
That's it — your DayZ server is now running with Steam Workshop mods! Your players can enjoy new maps, gear, gameplay mechanics, and whatever else the modding community has to offer.