
How To Install Workshop Mods On Your Dayz Client
Want to enhance your DayZ gameplay with Steam Workshop mods? This guide covers the installation process for both the Stable and Experimental versions of DayZ, so you'll be up and running with your favorite mods in no time.
Important: Looking to add mods to your DayZ server instead? Check out our guide on how to install Workshop mods on your DayZ server.
Installing Mods on Your DayZ Stable Client
For the Stable branch of DayZ, mods can be installed directly through the Steam Workshop.
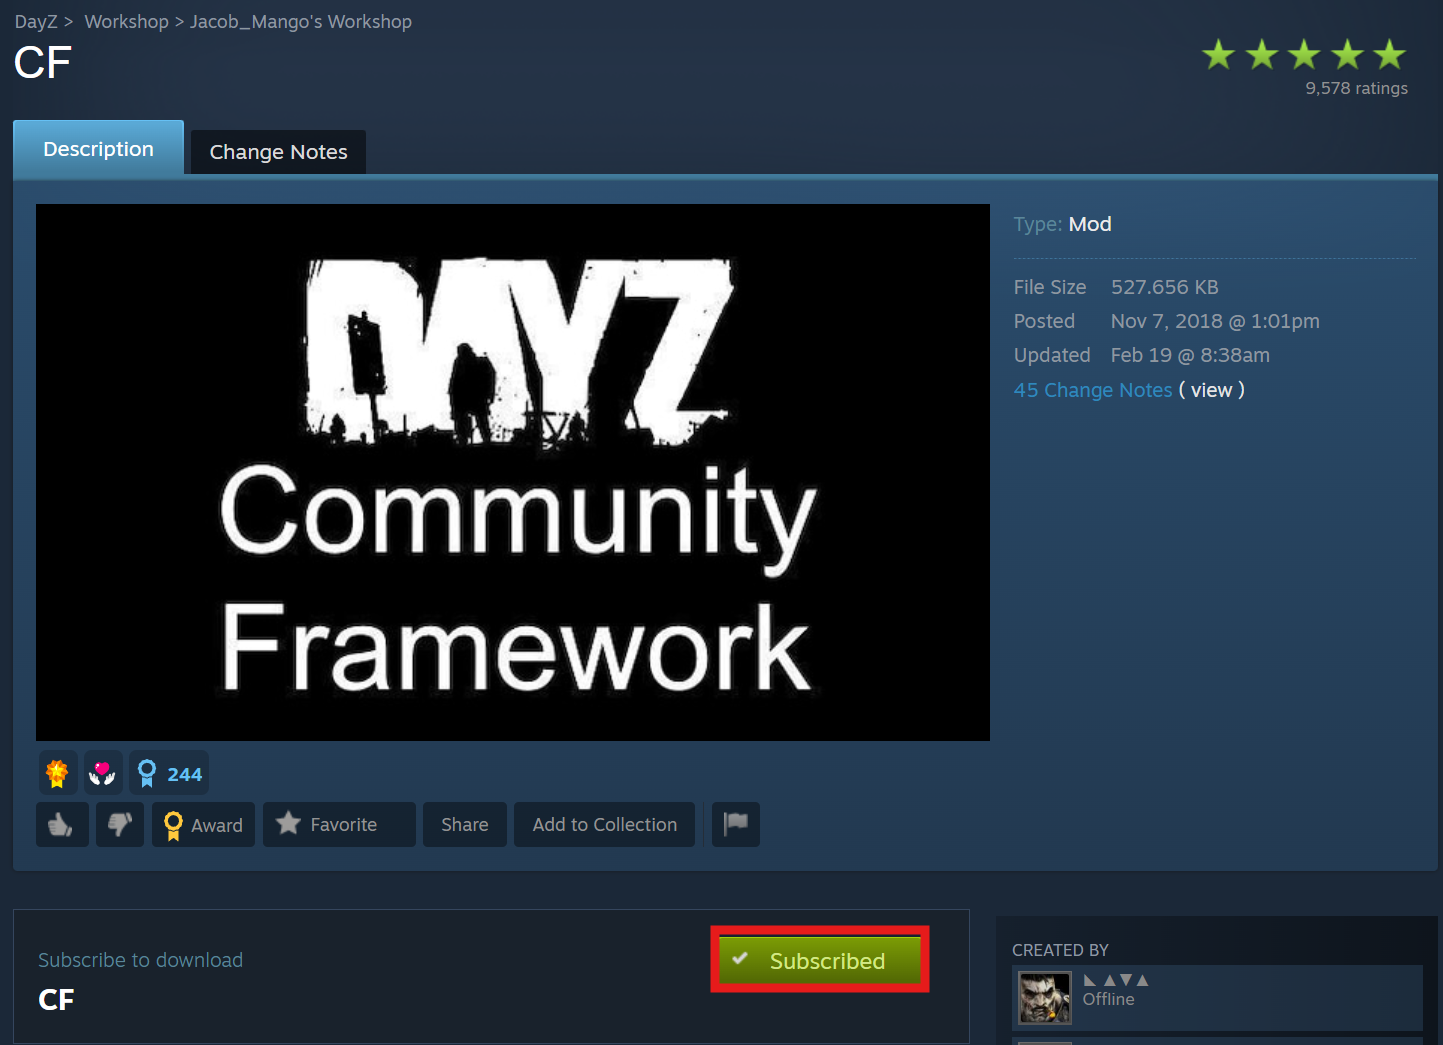
- Open the DayZ Steam Workshop.
- Browse for the mods you want and hit Subscribe on each one.
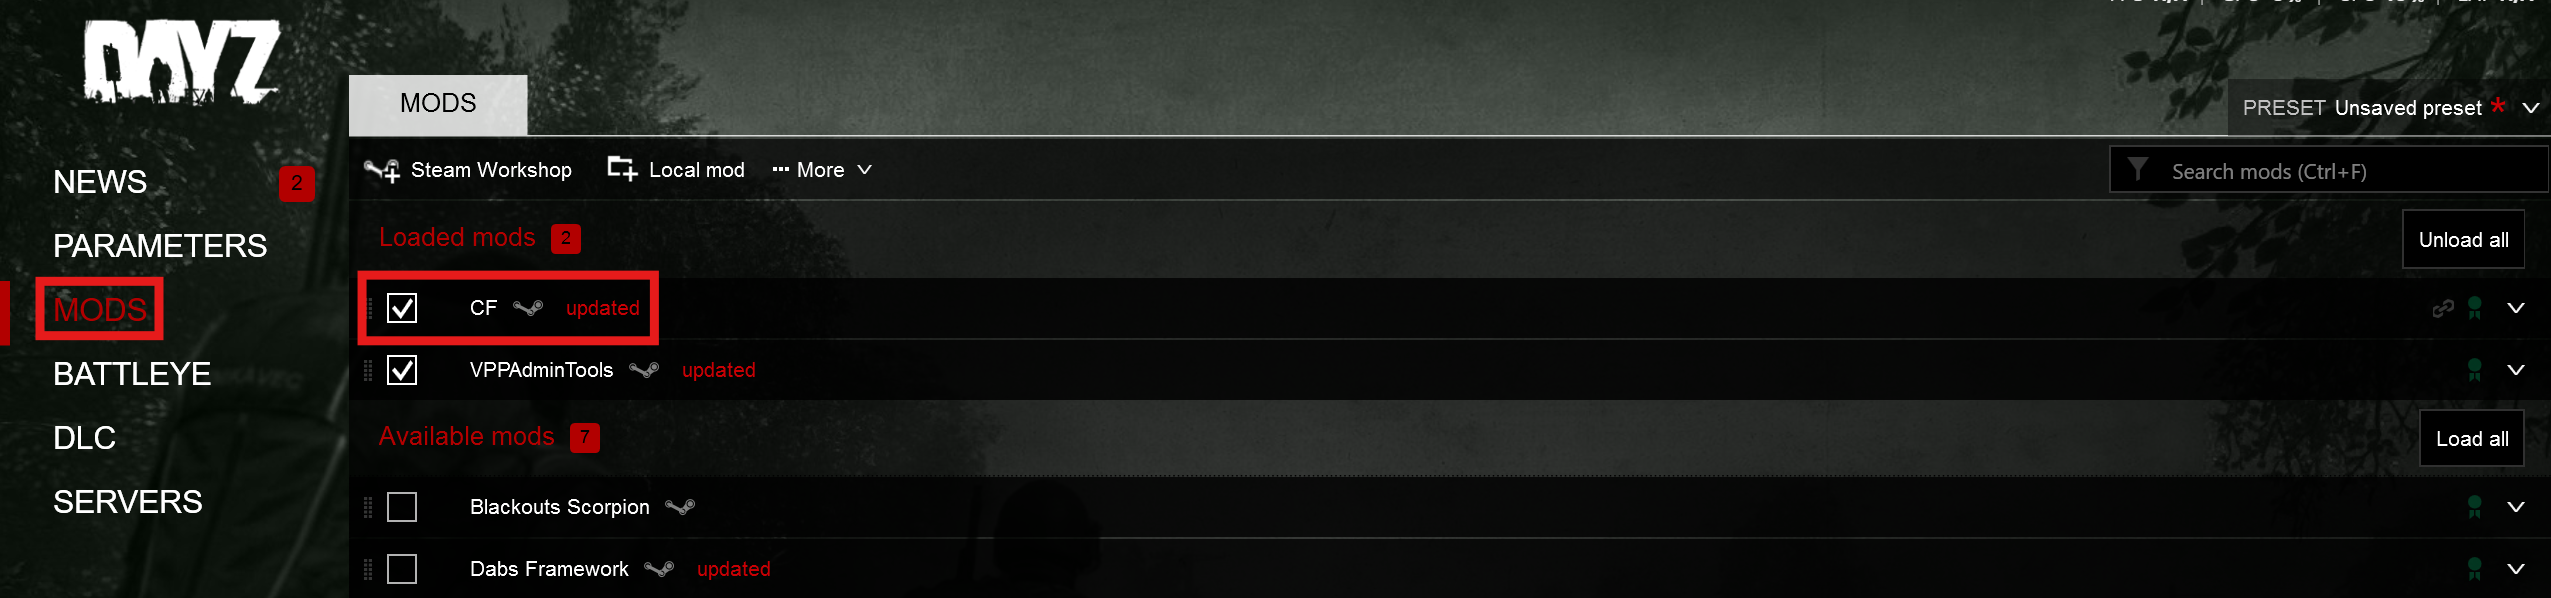
- Open DayZ and head to the MODS tab — your subscribed mods will appear there.
Your mods are now ready to use on the Stable client.
Installing Mods on Your DayZ Experimental Client
Running DayZ Experimental requires a few additional steps to get mods working, since Workshop mods need to be loaded locally.
- Open the DayZ Steam Workshop.
- Find and Subscribe to the mods you want to use.
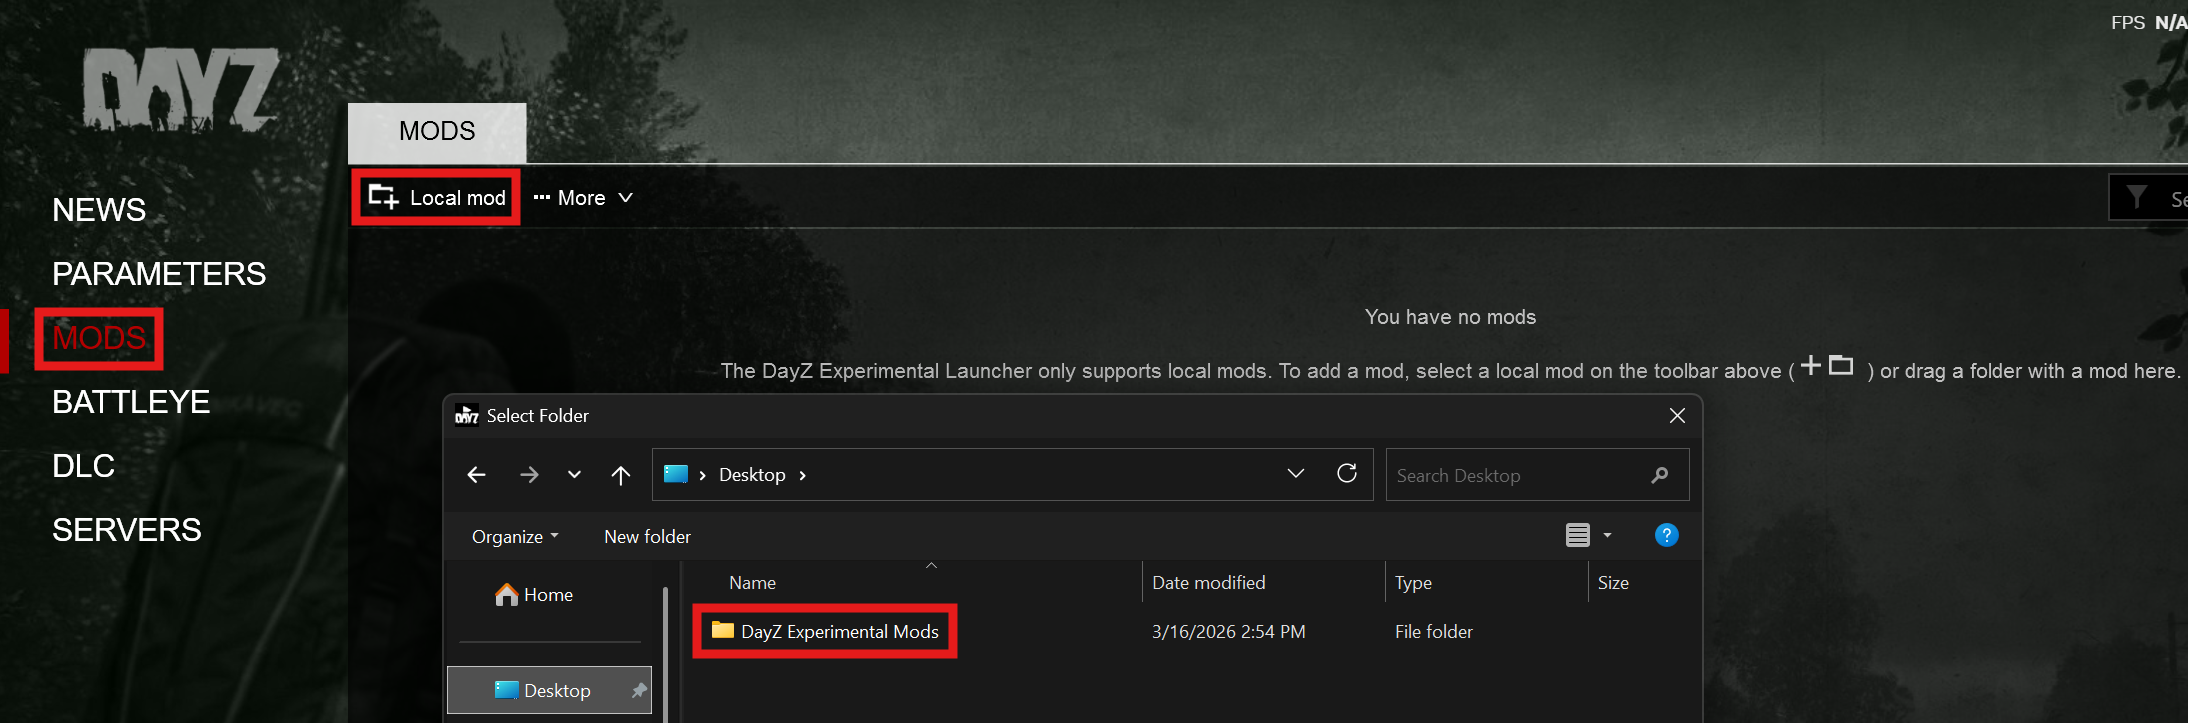
- Launch DayZ and navigate to the MODS tab.
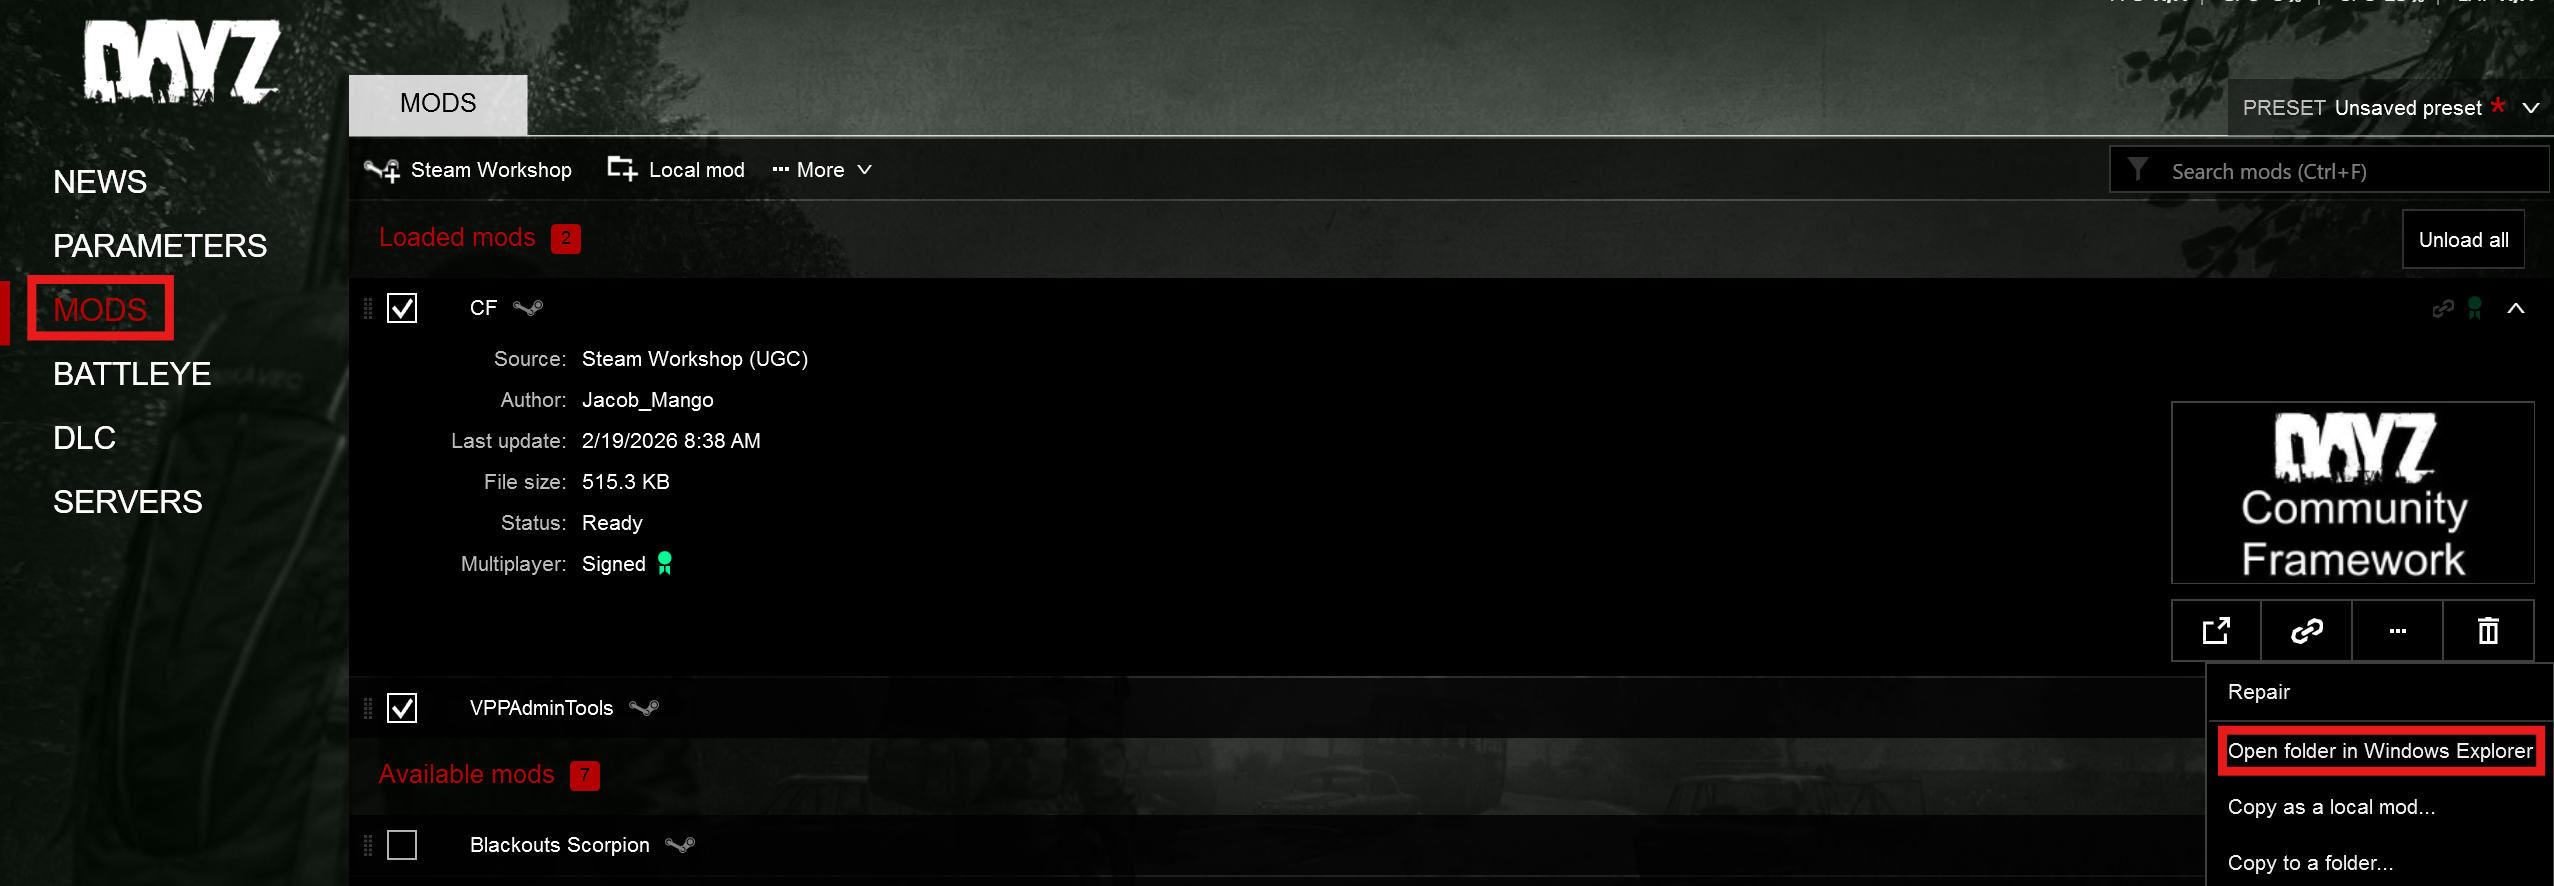
- Expand one of the mods using the drop-down arrow, click the three-dot menu, and select Open Folder in Windows Explorer.
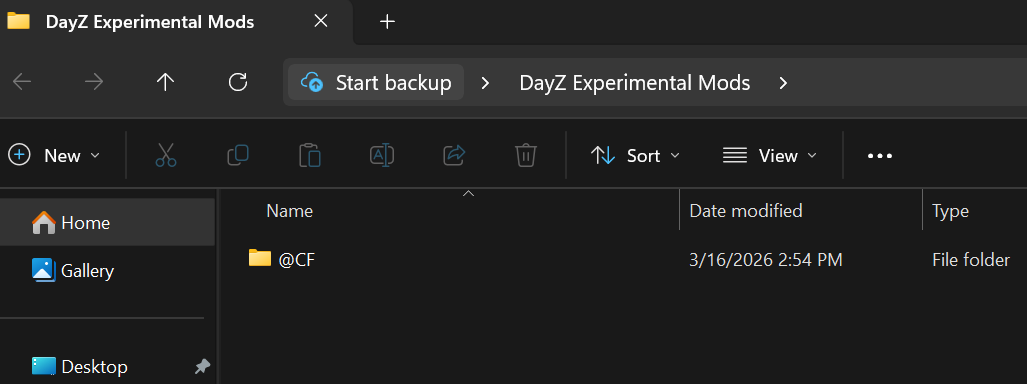
- Copy the mod folders and paste them into a new folder on your Desktop.
Important: If the mod folders aren't visible, try launching the game once first so the files get generated.
- Close DayZ and launch DayZ Experimental.
- Go to the MODS tab, click Local mod, and browse to the folder you created. Select your mods and click Select Folder.
Your mods are now installed and ready to go on the Experimental client.