
How To Upload A Custom World To Your Valheim Server
If you want to bring your single-player progress onto your Valheim server or start with a particular seed, you can upload a custom world. Valheim supports importing external world files, making migration straightforward.
You're free to upload as many world files as you like. Switching between them is as simple as changing the selected world in your valheim.properties file.
Uploading a Custom World to Your Server
- If you haven't done so already, create or load the world you want in single-player mode.
- Single-player worlds are stored at
C:\Users\<username>\AppData\LocalLow\IronGate\Valheim\worlds.
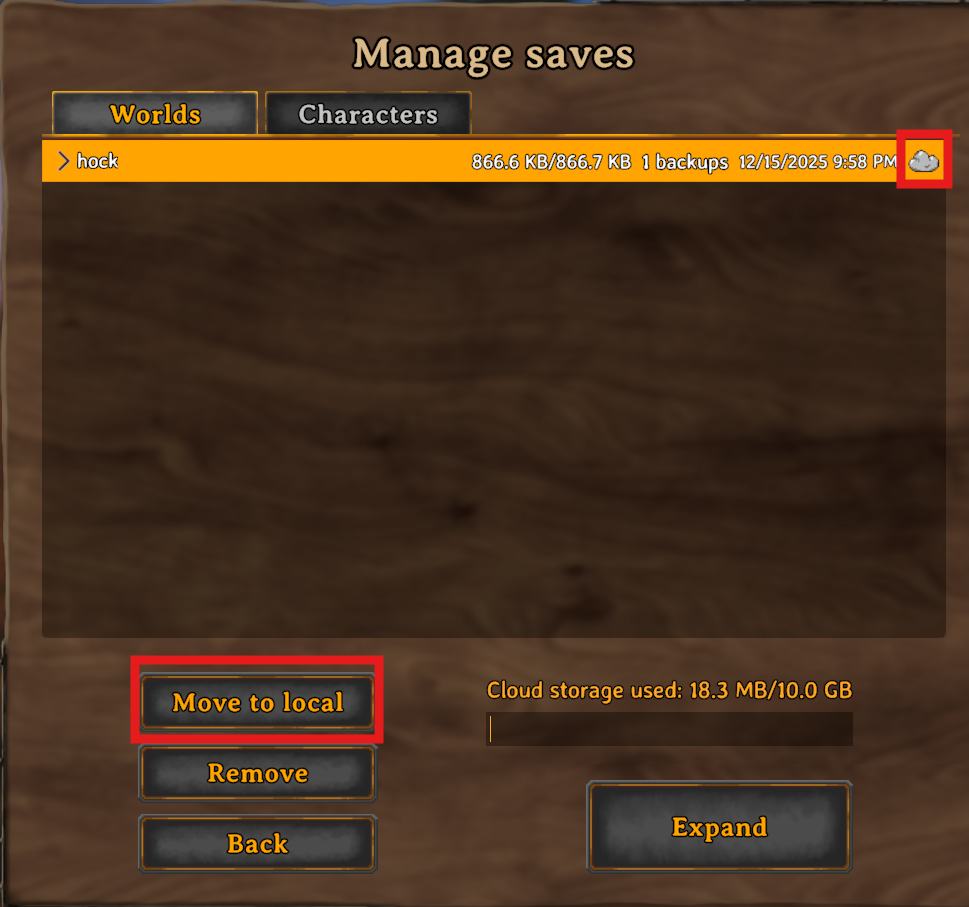
Note: Some Valheim worlds are saved to Steam Cloud. To access them locally, use the Move to Local option in-game. These saves will then appear in the C:\Users\<username>\AppData\LocalLow\IronGate\Valheim\worlds_local directory.
- Find the
<worldname>.dband<worldname>.fwlfiles for your world.
Note: In File Explorer, the file may just show as <worldname> if the .db extension is hidden.
- Open your server control panel and stop the server.
- Go to the File Manager tab and navigate to the /.config/unity3d/IronGate/Valheim/worlds_local directory.

- Upload both the
.dband.fwlfiles into this directory. - Head over to the Config tab.
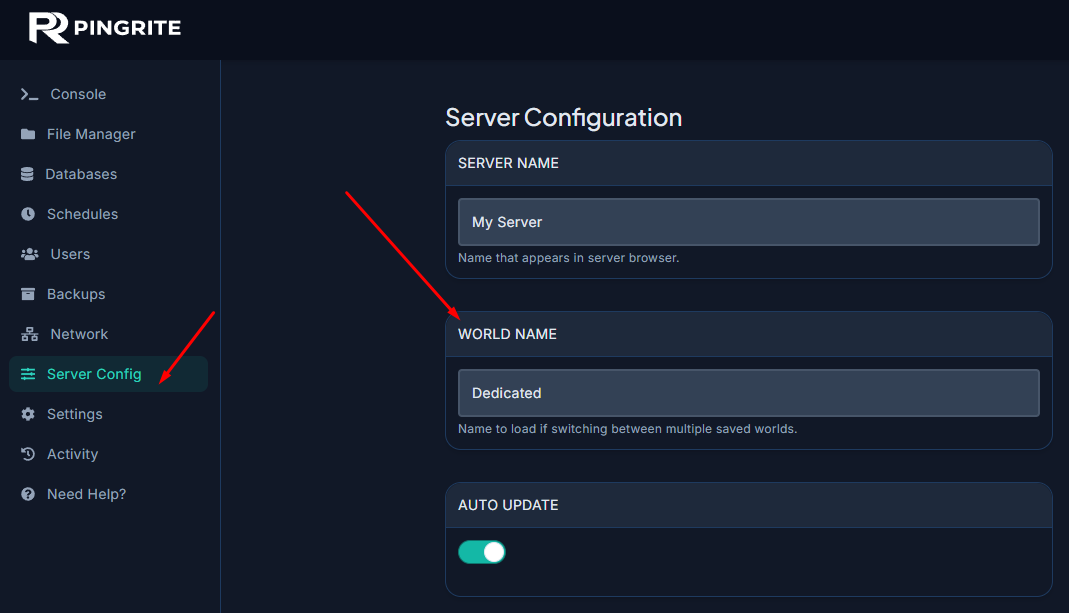
- Enter your custom world's name in the WOLRD NAME setting.
- Click Save and restart your server.
That's it — your custom Valheim world should now be loaded and ready to play on your server!